- Login

- Support

-
Have a question? Our team is here to help guide you on your automation journey.
-
Explore support plans designed to match your business requirements.
-
How can we help you?
-
- Search

English
Close
- Solutions
Featured Solutions
 Google Cloud Google Cloud and Automation Anywhere empower enterprises to fast-track their AI + Automation journey. Google Cloud
 Amazon Web Services Streamline workflows, reduce costs, and make automating even easier when you combine the Automation Success Platform with AWS Amazon Web Services
 - Resources
Featured
 Named a 2024 Gartner® Magic Quadrant™ Leader for Automation. Celebrating Six Years of Recognition as a Leader. Download report Download report
 -
Pathfinder Summit 2025 | Jan 21-23
 Unlock the full potential of automation + AI at Pathfinder Summit 2025—the ultimate global virtual community conference for automation innovators. Get your free ticket Get your free ticket
 - Company
Get in touch with us Get help, know more, learn, ask questions, or just say Hi! Contact Us Contact Us
Featured

Share this:

The Credential Vault is the Automation Anywhere secure storage container that is available to Enterprise A2019 users. It should be employed for the secure storage of any sensitive data that is used by a bot. Encryption keys for the vault are automatically generated during control room setup and are presented to the administrator for offline storage.
From within the control room, credentials can be maintained, created, and shared. Lockers and other grouping mechanisms can be used to limit and regulate access to individual users or processes for each individual or group of credentials. Once the credentials have been set up, they will be available to Automation Anywhere client users as variables.
Why use the Credential Vault?
There are many compelling benefits. Credential Vault:
- Minimizes the possibility of credential fraud
- Provides an environment to enable improved security
- Enables businesses to adhere to processes and credential management compliance
- Offers increased automation opportunities with secure data/applications
The Credential Vault also ensures credentials are managed securely and never stored in a plaintext manner and not hardcoded into bot source code (for attackers to find and read).
Using the Credential Vault
- From within the Control Room, navigate to the bots then Credentials menu item from the left menu.
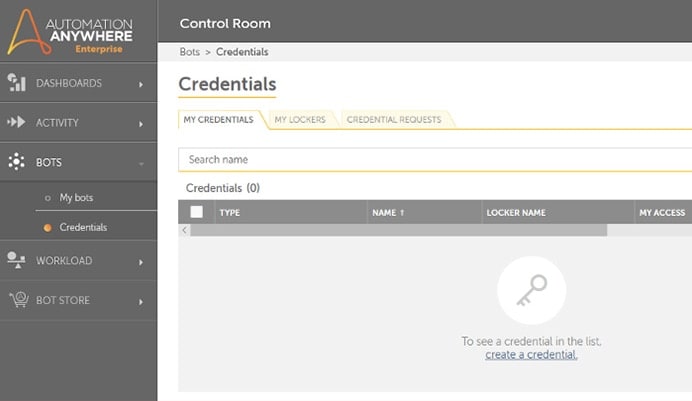
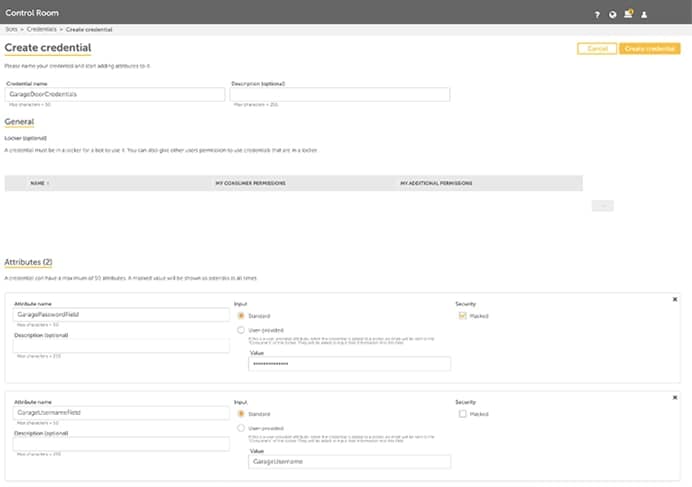
- Click the “create a credential” link and you’ll be prompted to enter information about the credentials you’re creating. You may opt to create an individual credential for an accounts username and another for an accounts password, or you can choose to group a credential set within the same set of attributes. For example, here is a credential created for a garage door opener that will contain the username and the password. Later, API keys or session variables may be added to this group.
- When you finish creating the credential, it will be available under the “My Credentials” tab of the credential manager page. (As seen in the first image). From here, you may choose to set additional permissions or assign it to a locker so that the credentials can be shared among other bots or users. When you finish creating the credential, it will be available under the “My Credentials” tab of the credential manager page. (As seen in the first image). From here, you may choose to set additional permissions or assign it to a locker so that the credentials can be shared among other bots or users.
Prepping credentials for use
There are a number of steps required to establish proper access control restrictions before you can use the credentials in the Automation Anywhere client.
- The Control Room administrator needs to create a new user role with permission to view and manage credential lockers.
- Assign the role to any bot designers who need access to the credential vault from the Automation Anywhere client.
- Create a locker for the credentials to reside in and share that locker with the users who have the newly created role and move the credentials into the locker.
After these steps are completed, you will be able to access the credentials from the Automation Anywhere client. Here are the steps in more detail:
Step 1 – Creating a new role
As a Control Room administrative user, navigate to the Administration -> Roles -> All roles -> Create Role menu option. Select a name for your new role.
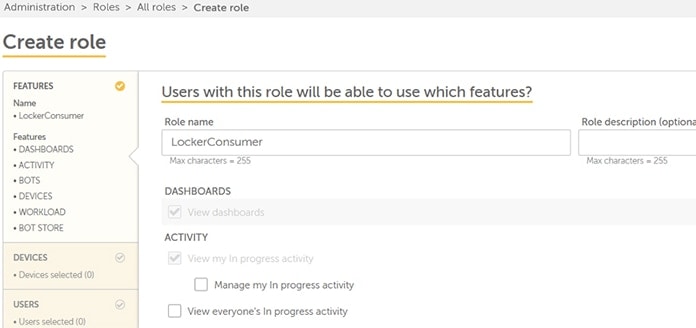
Be sure to select the “View and edit ALL credentials attributes value” permission.
Create the new role.
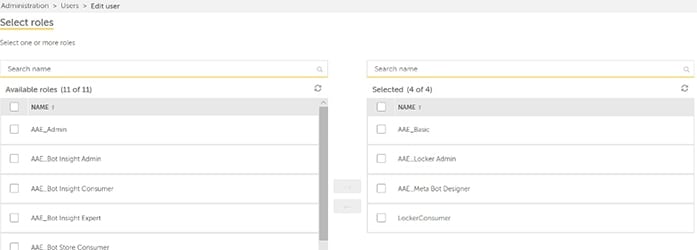
Step 2 – Assign role to bot designer
After creating the role, assign it to the bot designer user by editing the user (Administration -> Users -> Edit User). While you are at it, provide the bot designer user with the AA_Locker_Admin user role
Note: Only users with “AAE_Locker_Admin” role have the ability to create and manage lockers. If the bot designer user will not be responsible for these functions in your organization, assign the role accordingly to the correct user.
Step 3 - Create a locker
Create a locker for the credentials to reside in and share that locker with the users who have the newly created role.
Assign the desired credentials to the locker.
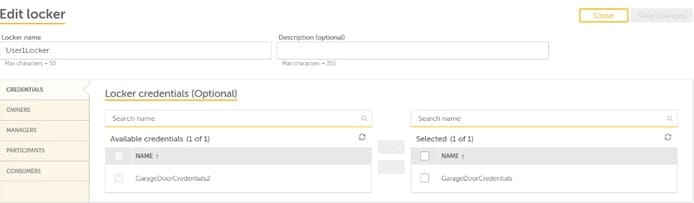
Ensure that your user and any other necessary users are granted access to the locker as owners, managers, or participants.
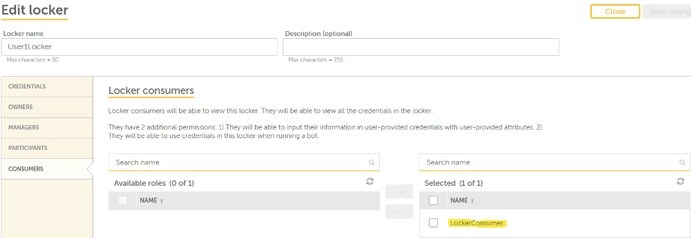
In the consumers section, ensure that the newly created LockerConsumer role is assigned to this locker. Finish by creating the locker.
Using the credentials in Automation Anywhere client
Once the credentials have been set up in the Control Room, and the locker with permission has been properly provisioned, they will be available for use in bots. The credentials can be added to the bots by creating a variable within the bot, or by selecting the option to add a credential in the actions when the option is available.
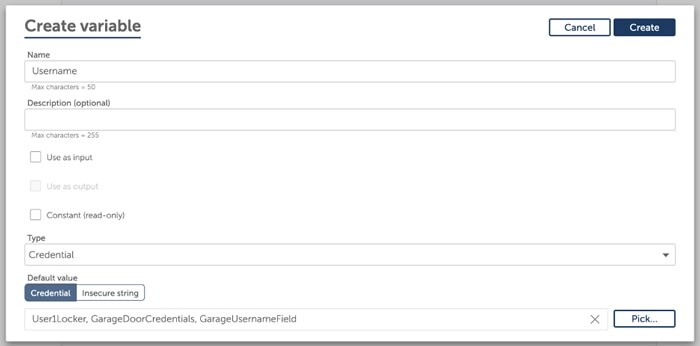
When adding a new bot action, navigate to the action you wish to invoke and pick the “Select a credential” option to add the credential as is.

Now you can manage your credentials securely and minimize the possibility of fraud.
Learn More about Protecting Your Bot Data.
Related Blogs


About Automation Anywhere Staff

Get to know the Automation Success Platform.
Try


For Students & Developers
Start automating instantly with FREE access to full-featured automation with Cloud Community Edition.